Table of Contents
**This page contains affiliate links and I will be compensated if you make a purchase after clicking on my links**
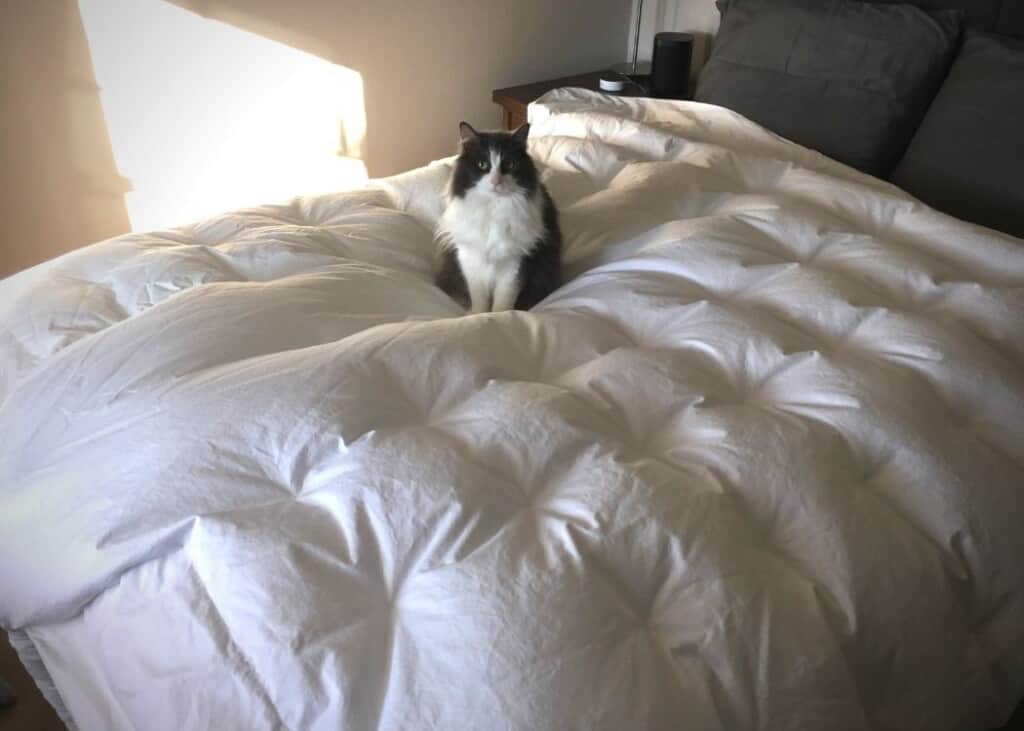
As a “hot sleeper” I’ve been preoccupied with finding a way to stay the perfect temperature while also feeling cozy under the covers.
Recently, I reviewed the pros and cons of different bed climate systems.
Although your needs may differ, I settled on the BedJet for the following reasons:
- Better price than the alternatives
- An air system that will remove excess humidity (eg, sweat) under the covers
- Responsive customer service
As an allergy-sufferer, I don’t want to generate a high-humidity breeding ground for dust mites, bacteria, and everything else. Staying dry is not only cooling but may reduce the presence of all these critters.
For my previous post, I had emailed them with a few questions, and they answered back almost immediately. I’m a big believer in good customer service, especially for things that are a bit technical to set up.
And did I mention the price was better?
Fast shipping
I ordered from BedJet directly as they offer a 60-day “no sweat” guarantee. (It’s also available from your favorite online store, but then you’re stuck with the standard 30-day return policy.)
I was surprised at how quickly it arrived. I ordered Monday morning and it was on my doorstep the next day. (I live in the greater Los Angeles area; your experience may vary.)
Straightforward setup
I’m no stranger to setting up electronic devices (home theater, computer, Smart home), and found setup to be relatively uncomplicated.
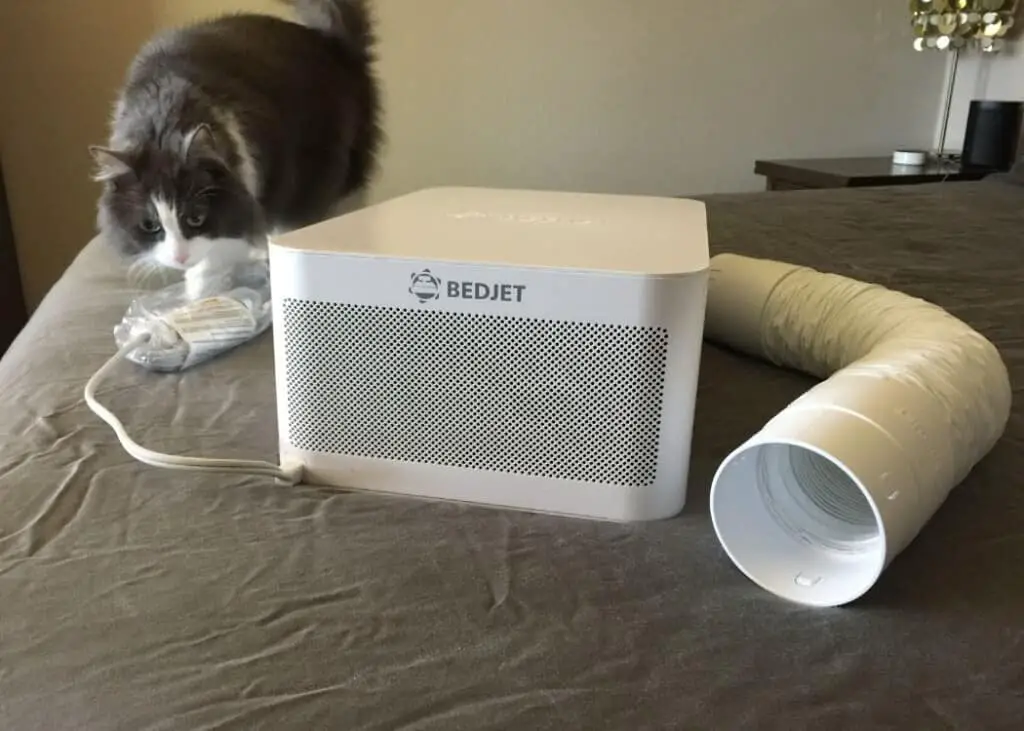
The control box fit under my bed (after I gave it a good shove) and connected to the included flexible hose and air nozzle. This hose not only flexes but stretches, giving you options of where to place the box relative to the nozzle.
You can place the air nozzle at the foot of your bed, or person (recommended) or at the left or right side of your mattress, near the foot of the bed.
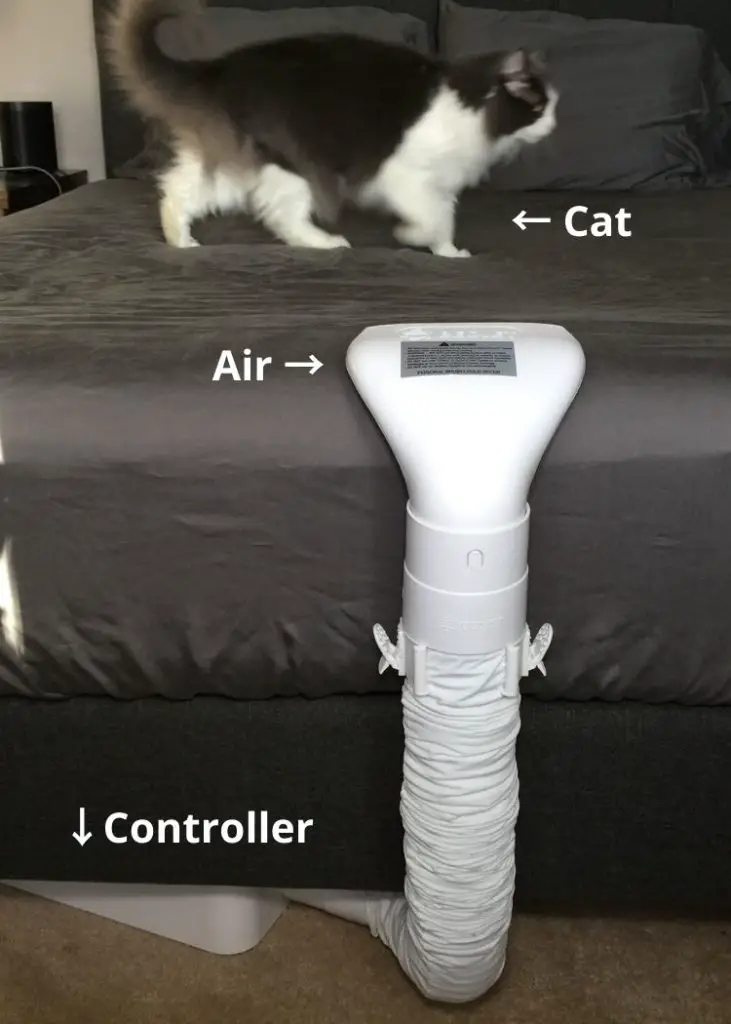
I’ve since changed the sheets for laundry day and switching out my bottom sheet with the BedJet still attached was not a problem.
The hose attaches to your mattress via a padded plastic bracket (“mattress mount base”) and plastic extenders. The extenders click together and will support a mattress up to 20” thick. Remove the extenders that you don’t need.
Once you plug in the box the remote will immediately find it. You then need to download the phone app.
As of this writing, BedJet has just released an Android app that can control the BedJet like the remote.
For Apple users like myself, we’ll need to wait. Currently, the only purpose of the Apple app is to connect the box to the internet for any needed firmware updates. This was a bit fiddly.
This is different from the BedJet 2.0 which may be controlled by the phone app on all platforms.
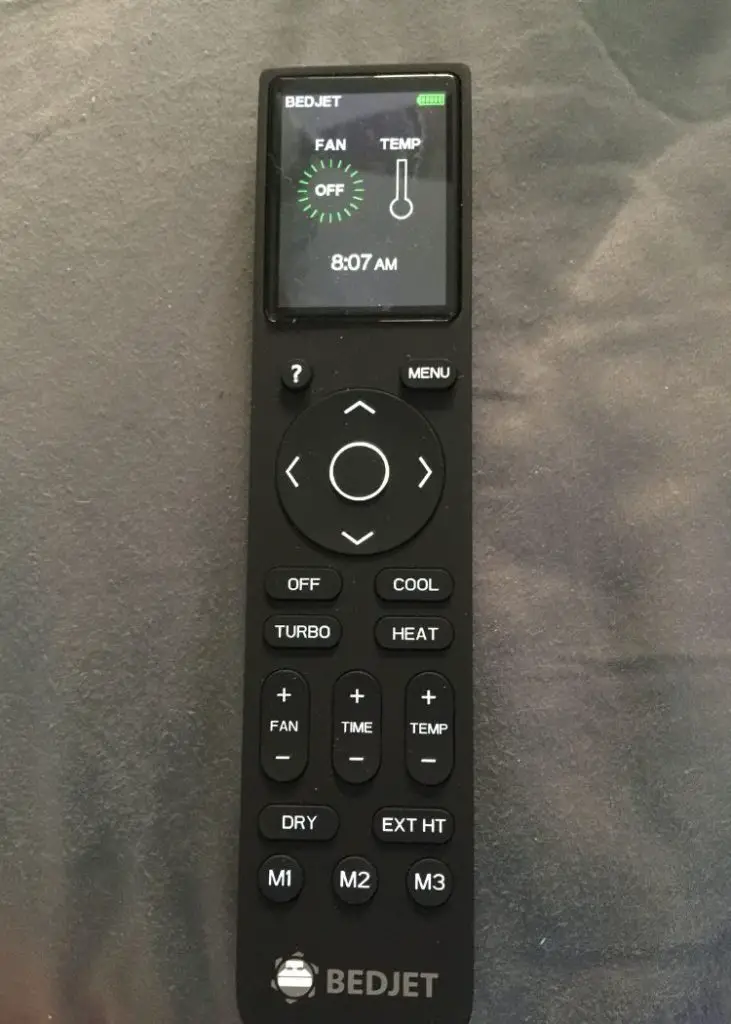
The remote is well laid out with an easily read screen. Controls are intuitive. This is especially important as you may be using it to make adjustments in the middle of the night…
But why does everyone think that a black remote is appropriate for use in a dark room?!!!
For example, I love the Harmony remote that controls my home theater but I’m always losing it in the couch, even if it’s sitting right next to me. I found the same problem with the BedJet remote. I now consciously keep it sitting on the side table next to my bed.
I’ve stuck glow-in-the-dark stickers on my Harmony remote. I plan to do the same with this one.
Unlike my Harmony remote, the BedJet remote does light up when you’re using it, so once you find the remote, you can control it in the dark without resorting to feel and memory.
I’m looking forward to the phone app that I can use on my large, easy-to-locate, iPad (which I sleep with). In addition, Alexa voice control coming in 2020, will be a welcome feature.
Challenging biorhythm programming
Both the BedJet 2.0 and the BedJet 3.0 support “Biorhythm technology” where you can program the BedJet to change temperatures throughout the night.
The idea is that you can start out relatively warm, but gradually cool down during the night to roughly match your own drop in core temperature. Then warm it back up when it’s time to wake up; no alarm clock needed.
From my reading, it sounds as if the older BedJet 2.0 comes with several pre-loaded profiles that you can try out and tweak.
The BedJet 3.0 remote comes with no profiles, but in retrospect, this is not necessarily a bad thing.
(For the new Android app, the biorhythm portion is still in beta. The plan is to offer more profiles within these apps, once available.)
You will need to build yours from scratch. Fortunately, the BedJet website has two listed that you can copy, but otherwise you are on your own.
Building a profile on the remote is easy, but the challenge is knowing what to build in the first place.
In fairness, you may wish to first try sleeping at a fixed temperature to determine your preferences. If you find yourself waking up too hot or too cold, then that may indicate you’ll need to program your future profile for a temperature change during the night.
You may need to take notes… And go through a bit of trial and error over several nights.
If in doubt, err on the side of being slightly warm. If you are too hot you can always stick a thermoregulatory foot or leg outside your sheets to instantly cool off.
I found my temperature comfort level did indeed drop during the night.
And obviously, keep the temperature of your bedroom on the cool side. (I like to keep mine around 65º F in the winter, and a few degrees higher in the summer. I could go lower, but I don’t want my furry friends to freeze.)
Using the BedJet
White noise
Yes, the fan can be noisy. I like to fall asleep to the sounds of the soothing waterfall in my fishpond right outside my bedroom window.
I had to turn down the fan to below 35% in order to hear my waterfall.
The BedJet works fine at slower fan speeds, however, your ability to sense a temperature change will take a bit longer.
(All BedJet features described below are at a low fan speed.)
Adjusting the temperature
In the BedJet recommended profiles, you start with super-hot Turbo heat for 5-10 minutes to pre-heat your bed, much like you would with an electric blanket.
I found this way too hot.
On my low 35% fan speed, it took several minutes to clear this out and replace it with the cool air I prefer.
Fortunately, both the temperature and fan controls are easy and intuitive to use.
Add an optional Cloud Sheet
I also purchased the Cloud Sheet, which substitutes for your top sheet. This sheet has several elasticized slits that snap closed. Depending on where you situate the air nozzle, place the closest slit around the air nozzle. Air fills up a series of baffles, rather than blowing directly on your feet.
This sheet is made of 100% cotton, or more specifically, cotton sateen on the top and cotton percale on the bottom. Percale is a looser weave that is considered more breathable, so it would make sense to place this on the side that faces you.
As I’ve written extensively, I’m not a fan of cotton. It holds moisture, preventing both cooling and drying. Presumably, the BedJet more than counteracts this issue, but I would like to see a future Cloud Sheet made of a proper “cooling” fabric, such as Lyocell or linen.
Blanket weight
It is intended that the Cloud Sheet will have some blankets on top of it, otherwise, it will puff up. Also, for the best temperature transfer, you’ll want the sheet to lie directly on top of you without another layer of air between you.
Therefore, it works best with a certain amount of blanket weight on top of it.
And if you’re like me, you like to feel the “weight” of blankets. So much so, that I’ve invested in several weighted blankets.
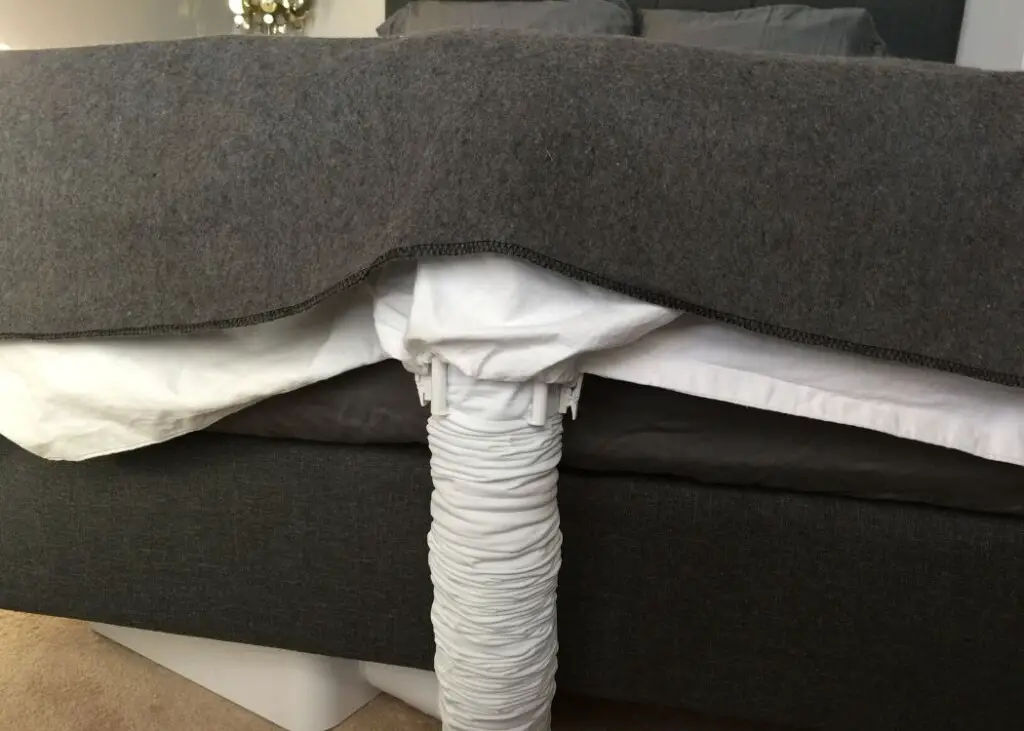
I started out the first night with the Cloud Sheet plus a military-style wool blanket. This blanket was a little too “lightweight”.
I believe the air from the BedJet, in combination with the Cloud Sheet, is making all my bedding relatively “lighter” in feel.
I immediately switched to a weighted blanket; the “lighter” one I own, which is less than 10% of my bodyweight.
So yes, the BedJet works with a weighted blanket
I’ve since experimented a bit and found that it’s best to balance the weight of your bedding with the fan speed. With heavier bedding, you need a higher fan speed and vice versa.
No Cloud Sheet needed
For couples with different temperature needs, the Cloud Sheet is probably a necessity. For the rest of us, it’s an option.
With the Cloud Sheet, I seemed to have an extremely narrow temperature comfort range—off one degree in either direction and I was either too hot or too cold. I found myself waking up and making tweaks with the remote.
Since you will never build a “perfect” temperature profile that works every night, this didn’t seem to be a sustainable model…
So I ditched the Cloud Sheet and went back to my favorite cooling sheets made of lyocell.
On top of that, I placed a weighted blanket, also made of lyocell.
Interestingly I was no longer waking up to adjust the temperature…
With the weighted blanket, the blown air does tend to get trapped around your feet. This is not necessarily a bad thing, as it’s easy to control your microclimate simply by making a few strategic body position adjustments.
You can either stretch out your legs to feel the cool breeze on your feet or curl up in a ball to avoid it.
If you’re too hot, then stretch out a leg so your foot is near the outlet, then do a small leg lift to release the cool air into the rest of the bed.
Likewise, if you’re on your back, flex your feet so that your toes are pointing up, holding the sheets up. That also releases the cool air into the rest of the bed.
I could also drop the fan speed down to 15-20%.
Blanket weight, part 2
After many nights of trial and error, I’ve discovered there are two general strategies when using your BedJet.
Personally, I find it a bit bothersome, but if you don’t mind being blown on, then use a slightly higher fan speed (eg, 30-40%) with relatively light bedding. This will allow the air to get everywhere and provide a consistent bed temperature.
Another downside is that you may need to know your exact temperature preference(s).
Alternatively, use a combination of a lower fan speed and heavier bedding. This will produce two microclimates, an isolated one at your feet generated by the BedJet, and the rest of you.
Depending on how the rest of you feels, you can “access” the BedJet microclimate with a simple leg lift or foot stretch. This gives you temperature options without trying to find the remote in the dark.
Or the old way, of kicking off your covers.
As a new user, you’ll need to experiment with different fan speeds, different temperatures, different bedding weights, and possibly, different sleeping positions.
Bedroom humidity
Because the BedJet is blowing air, stray moisture is being removed. To prevent the propagation of bacteria, dust mites, etc. this is very much a good thing.
If you’re using your BedJet during a humid summer, then the blowing air will remove all that excess moisture around you nicely.
But in a dry winter, you may lose more moisture than you would like.
On the higher fan speeds with the Cloud Sheet, I noticed my skin was drier. (But not so much an issue with the low fan speeds.)
If your skin is overly sensitive to dryness stick with a low fan speed
There are a couple of things that may help:
- Slather on the body lotion before turning in
- Raise the humidity level of your bedroom to 50%
The ideal bedroom humidity is 50%.
Above that and, and the dust mites breed. Below that, and you start to feel too dry.
If your bedroom is too dry, consider running a small humidifier, that will add cool mist into the air.
Remember, that the BedJet is pulling air from your room (your floor specifically).
If your bedroom is at 50%, the blowing air of the BedJet will effectively lower the humidity further under the covers, so body lotion may still be required.
Other BedJet uses
Ditch your bath towels
This is a suggestion from the BedJet instruction manual.
After your shower or bath, instead of using a towel to dry off, place your BedJet on Turbo Heat and jump in. It’s like a blow-dry for your body.
Dry your bed in the morning
In a previous post, I discussed the merits of leaving your bed unmade.
Obviously, I’m looking for any excuse NOT to make my bed. But the thinking behind this approach is to leave your bed to dry out thoroughly from any residual night sweat.
A more efficient strategy would be to run the BedJet on “dry” at full fan speed for 10 minutes or so after you get up and before you formally make your bed.
Overall, I’m enjoying my BedJet and would recommend it to those with sleep temperature issues
Most of my complaints are minor nitpicks and may be addressed in future programming updates.
I’m less of a fan of the 100% cotton Cloud Sheet—only purchase that if you’re a couple or prefer cotton.
| PROS | CONS |
|---|---|
| – Intuitive remote – One-degree temperature changes – Adjustable fan – Programable profiles to change temperature throughout the night – Excellent customer service – 60-day “no sweat” guarantee | – Cloud Sheet only available in cotton (temperature regulation challenge) – Control not yet available on all platforms with an app, or voice-control (but coming) – Remote can be easily misplaced due to dark color – Trial and error required for the perfect sleep experience |
BONUS VIDEO: BedJet review after 4 months
Update: DIY BedJet Cloud Sheet
Perhaps, like me, you’ve ditched cotton bedding. Or perhaps you don’t wish to pay extra for the Cloud Sheet?
It turns out that a duvet cover will work just fine as a cloud sheet replacement.
(If there are two of you with two BedJets, use two separate twin-sized comforters.)
I purchased this Eucalyptus duvet cover from Buffy. This cover has buttons along the bottom to close off the cover. It just so happens that the distance between these buttons fits comfortably over the BedJet hose at the bottom of my bed. To keep in the air, I tucked in the remaining open bottom of the cover under the mattress on either side of the hose.
It works great!
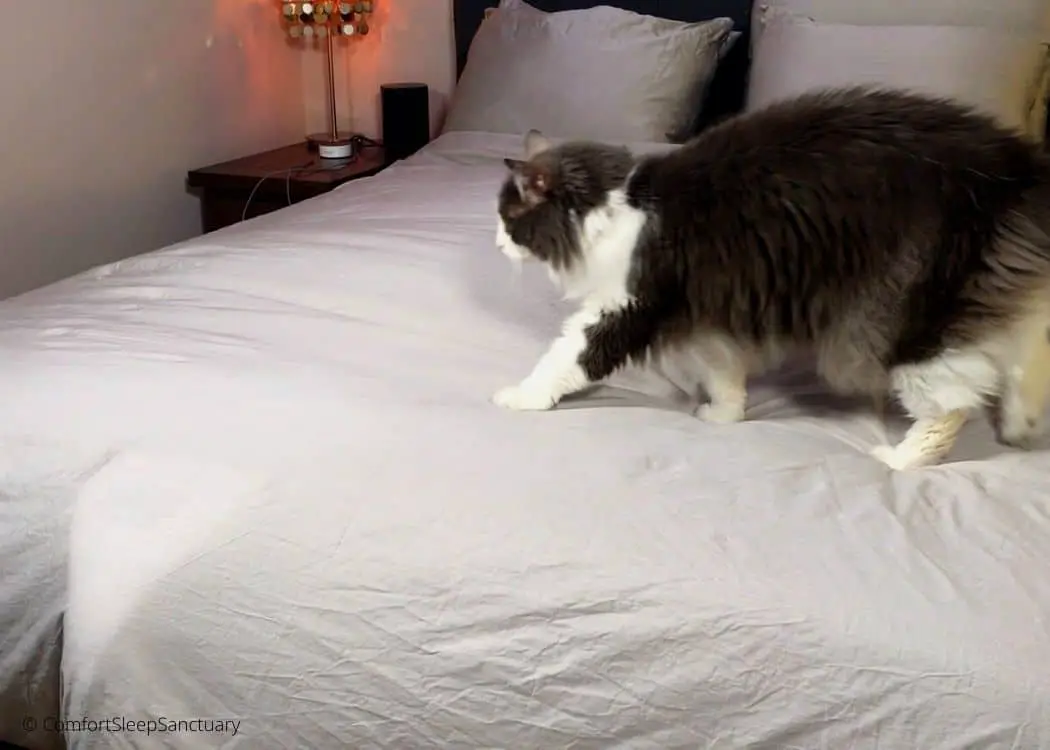
If you’re trying this at home, one important consideration is the density of the fabric weave. The Cloud Sheet itself is made of percale cotton on one side, and sateen cotton on the other. Percale is a relatively tight weave, while sateen is even tighter. This holds the air in long enough for it to distribute over the entire bed while allowing a tiny bit of leakage to facilitate your dryness and comfort.
I’ve made the mistake of trying the BedJet with my beloved linen sheets from Brooklinen. These sheets have a loose weave. Great for breathability, but not great for use with a BedJet. Most of the air escapes near the hose, and little makes it to the rest of you.
(If you’re placing a blanket or comforter over your makeshift cloud sheet, that will fix the problem and keep the air contained.)
In other words, look for a duvet cover with a tight weave that resembles sateen and percale. All of the reviewed Lyocell sheets fit this requirement. (Some brands sell matching duvet covers; some not.)
I purchased the BedJet with my own funds. However, I have since become an affiliate and will receive a modest commission if you make a purchase via the links above.
Related Posts
[If you experience issues with menus or links not working, it is most likely due to your Ad blocker.]


